Tuesday, December 26, 2017

The Pickled Christmas

At Thanksgiving this past October, my in-laws brought over a restaurant size jar of dill pickles.  Although our fridge isn't exactly small, it is always full.  So both DH and I knew that once that jar was opened, it would have to be eaten.

Since it's a crime to waste dill pickles, I had to think out of the "jar".  Off to the net for ideas.  And there were some "dills" out there.

Christmas Eve DS hosted the traditional open house at his new place.  The agreement was he'd clean and decorate his home and we would provide the food.  Can you see where this is going?  Yep, we tried out these crazy recipes on his guests.

Into the air fryer went about a third of the jar (after being sliced very thin).  The younger guests had fun eating these dehydrated pickle chips with the regular potato chips.  Apparently the flavour is really interesting.  I couldn't say from personal experience though since it's just way too salty for my taste.  And yes, this is how 1/3 of a jar of pickles looks after being dehydrated.


The next third of a jar was candied.  Slice the pickles then place into a large pot along with a half cup of sugar and 2 tablespoons of water.  Bring to a slow boil. The water and juice from the pickles will dissolve the sugar.  I let it boil until the sugar water passed the hard candy test.  (Look up how to test boiled candy when you don't have a candy thermometer.  The explanation on the net will be better than I can provide.)  Once the sugar water was at hard boiled stage, I used tongs to pull out the pickles and let them dry and harden on wax paper.  The remaining sugar/dill water was cooled until I could touch it.  Then I rolled it into the shape of butter scotch candy.

Both the pickles and the hard candy were tasty.  But not a treat for anyone with a loose filling or dentures.  So these treats were set out with a warning.  I didn't want to be responsible for any emergency dental appointments at Christmas!


Now for what turned out the best.  The chocolate dipped pickles.  Everyone who was brave enough to give it a try really enjoyed them.  And went back for more!

Slice the pickles up, lay them on a parchment covered tray and freeze for two hours.  Melt a small bag of dark chocolate chips along with a table spoon or two of coconut oil.  The oil keeps the chocolate from hardening faster than you can dip the pickles.

Dip the pickles into the chocolate and set onto parchment paper covered plates or trays.  Then place the pickles in the fridge until the chocolate is hardened.

The trick is to pop the entire treat into your mouth.  Do not nibble.  You don't get the blend of the pickle and chocolate that way.  These were really good and the one I'd make again.  (And gift back to my in-laws should they ever bring over another restaurant size of pickles again 😊)


Shout out to my son for the wonderful job he did of decorating his home for all of us.  He chose to go over the top with decorations from the 50's 60's and 70's.  Bringing back a lot of memories of Christmas Past.

Thank you and Hugs! Love ya!


Friday, December 15, 2017

Christmas Craft Memories

My Dad worked a lot of evening and night shifts.  Which meant keeping the house quiet so he could sleep.  Some of my favourite memories of Christmas past are of Mom and I crafting at the kitchen table.  It was something we could do and not disturb Dad's sleep.

Mom and I talked about those evenings recently and neither of us could remember how we made the stars and wall hangings from aluminum foil and Christmas wrap.

You know those videos that show up on YouTube that don't have anything to do with what you are watching?  Well one I saw recently was for a Polish Star.  Curious, I checked it out.  And there it was.  The instructions for making the aluminum foil star!   I sent the link to Mom and then sat down to make a few.  Only I used bits of left over Christmas wrap instead of foil.


Back in the early 60's we didn't have glue sticks that made making these stars really easy!

But there were other stars we made from Christmas wrap.  Either hung from the ceiling or as a wall hanging.  I couldn't find those, until Eileen from hearts2hands posed a link for stars made from fabric.  There is was.  The stars we used to make from wrapping paper.  Used wrapping paper of course.  Giving second life to the previous years savings.  We were the original recyclers.


I'm not sure if Mom is going to try her hand at making any of these.  Knowing her, if she does, there will be lots of embellishments as well as improvements.


Tuesday, November 28, 2017

Upcycling Placemats and a bit of catching up

A long story made even longer.  A couple of days ago I talked myself into getting an air fryer.  Yeah, I know, the person who doesn't cook has more kitchen gadgets than anyone else around.

Of course I had to make room in my pantry/linen closet to house the air fryer.  It's one way to get the closet emptied and organized.  During the clean up I came across four place mats gifted to me by a friend ages ago.  They are a bit on the large size.

Too nice not to use.  So I look around my kitchen in a desperate search for ideas.  On the counter is a glass baking dish that I have to return to my Mom.  That's it!  I'll make a holder for glass baking dishes.  That way they won't scorch the table/table cloth when sitting on the table.  And it will be much easier to pass along the dishes with no need for pot holders.

First comes bringing the sides together:
Next mark a line about 4 to 4 1/2" from the corner using washable marker:
Repeat for the other three corners then stitch along the line.  An hour later I have four dish holders:

DS will be hosting Christmas this year in his new home.   The outside of the house is all decorated.  Now for the inside.  A three skirt:
Bet he wishes he hadn't bought me that Christmas Disney  Cars fabric.

And two bows made from Christmas Pooh Bear (again gifted to me by DS).
If he didn't want me to make him something with this fabric, he shouldn't have given it to me!


Wednesday, November 22, 2017

Happy Belated Halloween

Here we are and November will be over before we know it.  And I forgot to post photos of DS's Halloween decorations!   He had fun celebrating the first Halloween in his new home.   Lots more Trick or Treaters than he had at the condo. 

There were probably 80 plus kids that stopped by his home.  We had about the same.  Since we were prepared for 160 kids there were a lot of left overs!

Here's DS's Halloween decorations.  I forgot to take photos of the projection show.   And no photos of our own decorations.  What was I thinking?


Thursday, September 14, 2017

DIY Airlock for the apple cider

I sure hope the first batch of apple cider turns out well.  It's used a lot of balloons!  I've only been able to re use each balloon twice.  The balloons filled up so quickly.  Here's one at three hours after "burping" (removing the carbon dioxide).


DH suggested checking some of the shops that sell brewing supplies and just buying an air lock.  They are supposed to be quite cheap. 

They probably are if you can find the shops close by.  The two that we knew about are now closed.  I guess there just are not enough home brewers to keep them in business. 

At the price of gas we were not about to go any further away from home.  So DH checked a few YouTube videos and came up with his own version.   A piece of plastic tubing, the cap for the juice bottle, and a water bottle.  That's it.

He drilled a hole into the juice bottle cap.  Inserted one end of the plastic tubing into that hole so it comes out the bottom by about a 1/2".  The other end of the plastic tubing goes into the cap of the water bottle.  The tubing reaches to about 2" from the bottom of the water bottle.  The bottle is then filled 3/4 with water.  Several small holes drilled into the cap allows the gas to escape. 

The gas leaves the juice bottle through the tube, into the water bottle.  It then forms a bubble in the water that rises to the top.  The gas then escapes.  The water keeps air from entering the juice bottle through the tube.  That shouldn't be a problem until the fermentation process stops producing the carbon dioxide.  But if we're not around when that happens, the air could get in and spoil the cider.  At least that's how the process was explained to me.  If we've gone through all this for no reason......


Tuesday, September 12, 2017

Apple Busy

DS's new home has a yard full of fruit trees.  I managed to convince some of our neighbours that they really, really needed the cherries.  Many 5 gallon pails later they would run when they saw me coming.  But we did get some cherry syrup as well as some jam.

But what to do with the apple tree?  The crab apple tree didn't produce that much.  But the huge apple tree doesn't know when to stop.  From the looks of it there are three different apples grafted to the tree.  The ones turning red are a bit smaller.  One is larger and seems to stay green.  The third type of apples are large and green.  All are tasty if tart.

This is the fifth sink full I've washed and processed.


Not exactly small are they?


So after many batches of apple sauce as well as pawning some off on an unsuspecting relative  (Thanks Mom!), it was time to make something else.

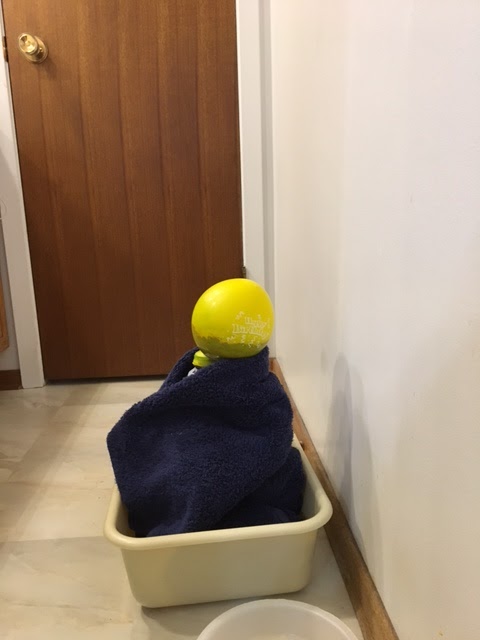
I'm going to try brewing an alcoholic beverage for the first time.  We have the fruit, the juicer, the bottles, the sugar, the yeast and the balloons.

Washing, cutting and juicing two sink fulls of apples produced 4 litres of apple juice.  A distilled water bottle was sterilized and put to use.


For the first half hour there was no sign that the yeast was working.  Mom suggested resting the bottle in a sink of warm water to get it started.  That worked.

 Everything I read and watched on the net said keeping the bottle out of light and warm should help the fermentation process.  Thus the towel.

I get the feeling I best "burp" the balloon before I go to bed tonight or I may have a rude awakening.  Six more days and I'll get to pour over to smaller bottles (discarding the sediment).  And then we'll have a taste test.  That's if the whole thing doesn't explode before then!

Monday, August 28, 2017

Going Somewhere?

Ten or more years ago I had some fun making luggage tags (or bus pass holders) for family, friends and a charity craft and bake sale.  Several hundred were made and sold.

Time passed and one of my best friends noticed that her luggage tags were looking pretty ratty.  Time to make new ones.  She puts these tags on everything that goes to the airport.  Luggage, carry on as well as her purse.  They are very bright which make them easy to spot.  No one will accidentally walk away with her belongings! 

I said I'd make some more tags for her.  She picked up the fabric.  One fat quarter and two hours later:


There is a clear plastic pocket for identification (business card, etc) on one side of each of these tags.  She'll see these coming down the conveyor belt!