Tuesday, December 26, 2017

The Pickled Christmas

At Thanksgiving this past October, my in-laws brought over a restaurant size jar of dill pickles.  Although our fridge isn't exactly small, it is always full.  So both DH and I knew that once that jar was opened, it would have to be eaten.

Since it's a crime to waste dill pickles, I had to think out of the "jar".  Off to the net for ideas.  And there were some "dills" out there.

Christmas Eve DS hosted the traditional open house at his new place.  The agreement was he'd clean and decorate his home and we would provide the food.  Can you see where this is going?  Yep, we tried out these crazy recipes on his guests.

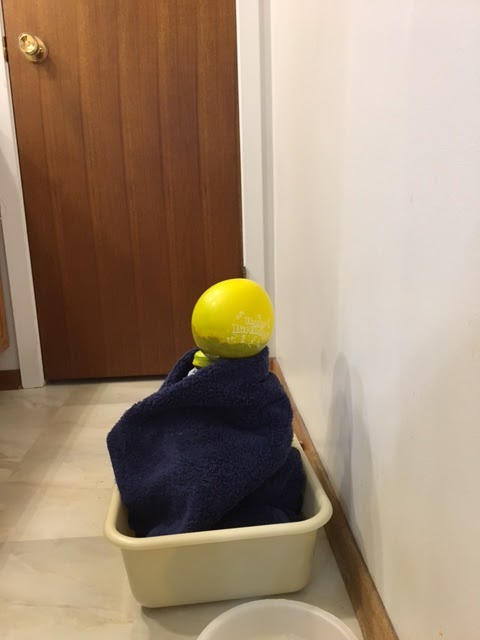
Into the air fryer went about a third of the jar (after being sliced very thin).  The younger guests had fun eating these dehydrated pickle chips with the regular potato chips.  Apparently the flavour is really interesting.  I couldn't say from personal experience though since it's just way too salty for my taste.  And yes, this is how 1/3 of a jar of pickles looks after being dehydrated.


The next third of a jar was candied.  Slice the pickles then place into a large pot along with a half cup of sugar and 2 tablespoons of water.  Bring to a slow boil. The water and juice from the pickles will dissolve the sugar.  I let it boil until the sugar water passed the hard candy test.  (Look up how to test boiled candy when you don't have a candy thermometer.  The explanation on the net will be better than I can provide.)  Once the sugar water was at hard boiled stage, I used tongs to pull out the pickles and let them dry and harden on wax paper.  The remaining sugar/dill water was cooled until I could touch it.  Then I rolled it into the shape of butter scotch candy.

Both the pickles and the hard candy were tasty.  But not a treat for anyone with a loose filling or dentures.  So these treats were set out with a warning.  I didn't want to be responsible for any emergency dental appointments at Christmas!


Now for what turned out the best.  The chocolate dipped pickles.  Everyone who was brave enough to give it a try really enjoyed them.  And went back for more!

Slice the pickles up, lay them on a parchment covered tray and freeze for two hours.  Melt a small bag of dark chocolate chips along with a table spoon or two of coconut oil.  The oil keeps the chocolate from hardening faster than you can dip the pickles.

Dip the pickles into the chocolate and set onto parchment paper covered plates or trays.  Then place the pickles in the fridge until the chocolate is hardened.

The trick is to pop the entire treat into your mouth.  Do not nibble.  You don't get the blend of the pickle and chocolate that way.  These were really good and the one I'd make again.  (And gift back to my in-laws should they ever bring over another restaurant size of pickles again 😊)


Shout out to my son for the wonderful job he did of decorating his home for all of us.  He chose to go over the top with decorations from the 50's 60's and 70's.  Bringing back a lot of memories of Christmas Past.

Thank you and Hugs! Love ya!


Friday, December 15, 2017

Christmas Craft Memories

My Dad worked a lot of evening and night shifts.  Which meant keeping the house quiet so he could sleep.  Some of my favourite memories of Christmas past are of Mom and I crafting at the kitchen table.  It was something we could do and not disturb Dad's sleep.

Mom and I talked about those evenings recently and neither of us could remember how we made the stars and wall hangings from aluminum foil and Christmas wrap.

You know those videos that show up on YouTube that don't have anything to do with what you are watching?  Well one I saw recently was for a Polish Star.  Curious, I checked it out.  And there it was.  The instructions for making the aluminum foil star!   I sent the link to Mom and then sat down to make a few.  Only I used bits of left over Christmas wrap instead of foil.


Back in the early 60's we didn't have glue sticks that made making these stars really easy!

But there were other stars we made from Christmas wrap.  Either hung from the ceiling or as a wall hanging.  I couldn't find those, until Eileen from hearts2hands posed a link for stars made from fabric.  There is was.  The stars we used to make from wrapping paper.  Used wrapping paper of course.  Giving second life to the previous years savings.  We were the original recyclers.


I'm not sure if Mom is going to try her hand at making any of these.  Knowing her, if she does, there will be lots of embellishments as well as improvements.


Tuesday, November 28, 2017

Upcycling Placemats and a bit of catching up

A long story made even longer.  A couple of days ago I talked myself into getting an air fryer.  Yeah, I know, the person who doesn't cook has more kitchen gadgets than anyone else around.

Of course I had to make room in my pantry/linen closet to house the air fryer.  It's one way to get the closet emptied and organized.  During the clean up I came across four place mats gifted to me by a friend ages ago.  They are a bit on the large size.

Too nice not to use.  So I look around my kitchen in a desperate search for ideas.  On the counter is a glass baking dish that I have to return to my Mom.  That's it!  I'll make a holder for glass baking dishes.  That way they won't scorch the table/table cloth when sitting on the table.  And it will be much easier to pass along the dishes with no need for pot holders.

First comes bringing the sides together:
Next mark a line about 4 to 4 1/2" from the corner using washable marker:
Repeat for the other three corners then stitch along the line.  An hour later I have four dish holders:

DS will be hosting Christmas this year in his new home.   The outside of the house is all decorated.  Now for the inside.  A three skirt:
Bet he wishes he hadn't bought me that Christmas Disney  Cars fabric.

And two bows made from Christmas Pooh Bear (again gifted to me by DS).
If he didn't want me to make him something with this fabric, he shouldn't have given it to me!


Wednesday, November 22, 2017

Happy Belated Halloween

Here we are and November will be over before we know it.  And I forgot to post photos of DS's Halloween decorations!   He had fun celebrating the first Halloween in his new home.   Lots more Trick or Treaters than he had at the condo. 

There were probably 80 plus kids that stopped by his home.  We had about the same.  Since we were prepared for 160 kids there were a lot of left overs!

Here's DS's Halloween decorations.  I forgot to take photos of the projection show.   And no photos of our own decorations.  What was I thinking?


Thursday, September 14, 2017

DIY Airlock for the apple cider

I sure hope the first batch of apple cider turns out well.  It's used a lot of balloons!  I've only been able to re use each balloon twice.  The balloons filled up so quickly.  Here's one at three hours after "burping" (removing the carbon dioxide).


DH suggested checking some of the shops that sell brewing supplies and just buying an air lock.  They are supposed to be quite cheap. 

They probably are if you can find the shops close by.  The two that we knew about are now closed.  I guess there just are not enough home brewers to keep them in business. 

At the price of gas we were not about to go any further away from home.  So DH checked a few YouTube videos and came up with his own version.   A piece of plastic tubing, the cap for the juice bottle, and a water bottle.  That's it.

He drilled a hole into the juice bottle cap.  Inserted one end of the plastic tubing into that hole so it comes out the bottom by about a 1/2".  The other end of the plastic tubing goes into the cap of the water bottle.  The tubing reaches to about 2" from the bottom of the water bottle.  The bottle is then filled 3/4 with water.  Several small holes drilled into the cap allows the gas to escape. 

The gas leaves the juice bottle through the tube, into the water bottle.  It then forms a bubble in the water that rises to the top.  The gas then escapes.  The water keeps air from entering the juice bottle through the tube.  That shouldn't be a problem until the fermentation process stops producing the carbon dioxide.  But if we're not around when that happens, the air could get in and spoil the cider.  At least that's how the process was explained to me.  If we've gone through all this for no reason......


Tuesday, September 12, 2017

Apple Busy

DS's new home has a yard full of fruit trees.  I managed to convince some of our neighbours that they really, really needed the cherries.  Many 5 gallon pails later they would run when they saw me coming.  But we did get some cherry syrup as well as some jam.

But what to do with the apple tree?  The crab apple tree didn't produce that much.  But the huge apple tree doesn't know when to stop.  From the looks of it there are three different apples grafted to the tree.  The ones turning red are a bit smaller.  One is larger and seems to stay green.  The third type of apples are large and green.  All are tasty if tart.

This is the fifth sink full I've washed and processed.


Not exactly small are they?


So after many batches of apple sauce as well as pawning some off on an unsuspecting relative  (Thanks Mom!), it was time to make something else.

I'm going to try brewing an alcoholic beverage for the first time.  We have the fruit, the juicer, the bottles, the sugar, the yeast and the balloons.

Washing, cutting and juicing two sink fulls of apples produced 4 litres of apple juice.  A distilled water bottle was sterilized and put to use.


For the first half hour there was no sign that the yeast was working.  Mom suggested resting the bottle in a sink of warm water to get it started.  That worked.

 Everything I read and watched on the net said keeping the bottle out of light and warm should help the fermentation process.  Thus the towel.

I get the feeling I best "burp" the balloon before I go to bed tonight or I may have a rude awakening.  Six more days and I'll get to pour over to smaller bottles (discarding the sediment).  And then we'll have a taste test.  That's if the whole thing doesn't explode before then!

Monday, August 28, 2017

Going Somewhere?

Ten or more years ago I had some fun making luggage tags (or bus pass holders) for family, friends and a charity craft and bake sale.  Several hundred were made and sold.

Time passed and one of my best friends noticed that her luggage tags were looking pretty ratty.  Time to make new ones.  She puts these tags on everything that goes to the airport.  Luggage, carry on as well as her purse.  They are very bright which make them easy to spot.  No one will accidentally walk away with her belongings! 

I said I'd make some more tags for her.  She picked up the fabric.  One fat quarter and two hours later:


There is a clear plastic pocket for identification (business card, etc) on one side of each of these tags.  She'll see these coming down the conveyor belt!


Thursday, August 24, 2017

Bento Box Quilt

I had been collecting FQ's with musical theme for a number of years now.  The plan was to make two quilts for two music lovers in the family.  Their lives have taken a different focus lately.  A music themed quilt would no longer be the way to go.  But the fabric collection kept saying "do something". 

One of the ladies on the hearts2hands Yahoo quilting group was making a Bento Box quilt.  So I thought why not.  And the top was made.  And gathered dust.  And was forgotten about. 

The top was came to surface during a recent sewing room clear out.  What a great top to practice some different quilting patterns!  It was loaded on to the frame.  And stayed there.  And time passed.  And nothing else was getting quilted because this top needed to get done. 

Two days ago a friend put out a call for help.  She needs to get three quilts done quickly.  And her sewing machine will not work.  Could she possibly use my Bailey?  Why yes, of course she could.  The Bento Box could be taken off.  Or could be simply quilted.  Knowing if I took it off the frame the top may never get quilted I revved up the Bailey.  Using an all over leaf pattern, the top was finished in two hours.

Next comes a thorough cleaning and Bailey will be ready for my friends three quilts.  Here's the Bento Box quilt.  Ready for the next call for charity quilts:


This is not a pattern I will do again.  I can think of so many other patterns that I enjoy so much more!

Friday, August 11, 2017

Lots of Chickens

Yesterday was my mother and father in law's 67th anniversary.  Fortunately DH gifted me with several kits for chicken wall hanging.  Why chickens?  Well it's been a running joke over the years to gift Mom and Dad with chickens.  Chicken lawn ornaments, pictures, spoon holders, you name it. 

We went over with the traditional KFC and a chicken wall hanging/runner.  The hanging was finished with just enough time to wash, dry and press.  Talk about leaving it to the last minute!

DH had actually gifted me with two of these kits.  One to make for his parents and one for us.  That way we have the complete set from the quilt book he gave me at the same time.

So here are a Lot of Chickens:


Wednesday, August 2, 2017

Cat Sitting and Bird House Wall Hanging

We have two visiting felines.  They arrived late Friday night.   They are sisters and you would think their personalities would be similar.  Nope.  You would also think they would get along.  Nope.
 
Fluffy settled in right away.  A real Purr Girl.  Cuddles does not cuddle.  She was terrified.  We had no sighting of her until Sunday night.  Which was a worry.   It doesn't happen often, but some cats there is a concern that their organs start shutting down if they don't eat or drink within a certain time frame.  At least that's what we were told about our cats a long time ago when we sent them to a kitty resort while we vacationed.
 
Cuddles was way over that time frame.  My knees are sore from crawling around checking in every hiding place we could think of.   Because of all our hobbies and clutter, there are a LOT of hiding places.  We really need to get rid of some stuff.   We did have a sighting once.  But by the time we got some food and water she had moved on.  

For the first time ever,  in our years of having cats come to visit, canned tuna for humans did not work.  I opened more cans of different food than I've ever had to for visiting felines.  Fluffy thought she was in heaven.  Finally Sunday evening around 11 pm there was a Cuddles sighting.  We were able to get her to eat.  Now we could relax a bit.  Monday and Tuesday there were a few sightings but no sounds or signs of her eating.   This morning she came out for a visit.  I still haven't seen her eat, but she batted at a bit of yarn so she can't be in that bad of shape food wise.

With constantly searching for Cuddles there was little time to get into the sewing room to work on the last bit of the bird house wall hanging.  I finally got to the sewing machine and it's done.  
 
The flowers were supposed to have button centers.  But I hate sewing on buttons.  So I used the Flower foot that DS picked up for me months ago.  Very easy to use but the instructions that came with it got me a bit confused.  Actually they were good instructions, I was just too impatient.  There's a close up photo of the flowers with two different size centers.   There are quite a few different looks you can get with this foot.  I'll have to play around with it some more.


Now that is finished I get to test those attachments we found at the Salvation Army Thrift Store yesterday    I don't want to start any sewing projects until the cats are back home with their owners.  Pins, thread, etc. are very interesting things to check out when you're not familiar with them.  And a safety hazard.  In the past we've taken care of cats that were not as good at finding places to hide.  I could always get them out of the sewing room when it was time to close it up.  Cuddles is just too good at hiding.  
 
But sewing machines can be brought out to the kitchen counter for a good clean and for checking out attachments etc.  So That's my next sewing related project.

Tuesday, August 1, 2017

Thrift Store Find

Raining today.  So what better way to spend the day than to clear out some clutter.  And buy some more.

A trunk full for Value Village and then off to the Salvation Army Thrift Shop.  At the Thrift Shop we checked out the craft/sewing area.  Low and behold....just waiting for me....is an old candy tin with a masking tape label that says "sewing attachments".  For only $2!!!

A quick clean up and I'm off to spend the afternoon trying the attachments out.  Not sure which of our vintage machines I'll use.  They are all fun.


Now if I can just figure out what the black disks are for and for what kind of machine......

Thursday, July 27, 2017

Time to hit the beach?

I wish.  But no trip to the beach for us this year. 

DH has his days full getting the back yard ready to put up the new shed.  Everything that was in the shed that the storm blew away is keeping safe and dry under our gazebo. 

Concrete blocks are piled up everywhere while he levels out the area where the new shed will go.  Of course we are having heat warnings.  This couldn't have happened in spring when our weather was prefect for working outside.

Sew, the closest I'll be getting to the beach this year is by making a wall hanging.
It's the third from the book DH gave me. 

I used the DIY spray baste again.  It's working really well.  Holds the three layers together long enough for me to quilt.  No damaging the earth with aerosols.  No stinking us out of house and home with the fumes from the commercial stuff.  And a huge cost savings!  A win/win all around.


Next wall hanging in the book is a bird house.  The fabrics have been selected.  Today will be spent tracing the shapes onto the fusible web.  I may even get to ironing the tracings onto the fabric. 

Monday, July 24, 2017

Wall Hanging #2

The second wall hanging from the pattern book DH gave me is finished!  This one came together quite quickly.  And I figured out a way to make it easier to machine stitch around the appliqué pieces!


When either zigzag stitching or button hole stitching around the appliqué pieces that are very different in colour or value it's easy to see where to stitch.  But when stitching around a piece that is similar in colour to it's neighbour, that's a different story.  I use a clear foot but with my poor eye sight it's still very difficult.

An example is where the white bunny ears are on the back ground fabric.  Or the light yellow wings lay on top of the darker yellow body.  Or check my last post and the orange feathers on the owl.  That's where I could really have used this simple idea! 

What solves this issue?  Well, it's my favourite marking tool.  Crayola Washable markers for kids.  Trace around the shape you are having problems seeing under the sewing machine foot and that solves the problem.  It all comes out in the wash!


Saturday, July 22, 2017

Another series of quilts.....

Ages ago DH gifted me with a quilt book of fun wall hangings.  He included two fabric kits as well..  I finally got started (and finished) the first quilt found in the collection:


I wanted to use spray basting to secure the top, bat and backing.  Naturally the can of basting spray I had was plugged.  No matter what I did, nothing would come out.  Nothing!  Shaking the can told me that it was at least half full.

Time to experiment with DIY spray baste. 

2 cups of water and 1/2 teaspoon salt brought to a boil.

Mix 1 cup of water and 3 teaspoons of flour mixed to remove any lumps
Slowly stir the 1 cup of water and flour into the boiling salt water.
Turn down heat
Stir until flour/water mixture thickens
Pour into a spray bottle and and 1 cup rubbing alcohol. 

Spray the batting and lay onto the backing, smooth.  Let dry a bit and then press.
Spray the other side of the batting and place top onto the bat.  Smooth, let dry a bit, then press.  Let dry completely.

It worked quite well providing the spray basted quilt is not moved until completely dry.  (Ask me how I figured that out....)

I will definitely be washing this quilt right away.  Having flour in the quilt makes me think of bugs.  And we can do without that problem.  But for a temporary basting spray, for small projects, this mixture works quite well.


Saturday, July 15, 2017

Finally....I can show you Eileen's latest design!

A while back I mentioned being fortunate to be chosen to test a pattern for Eileen who is PineRose Designs.

Finally the testers have permission to post photos of their table runners. Check it out!


There is also instructions for the long ends of the runner to come to a point instead of the squared off version I chose to do.

Eileen's patterns are easy to follow.  Most importantly there are no miscalculations when it comes to fabric requirements.


 Unlike:


I'm currently working on a pattern by another designer.  The kit was a Christmas gift from DH a while back.  The pattern calls for four WOF (width of fabric) 2" strips.  These strips are then to be sub cut into twelve 14 1/2" lengths.

The quilt store that made up the kits put in 8" strip of the fabric to used in this step.  You can cut four 2 strips out of that with no problem.

The problem is when you sub cut  those strips.  Lets see.  14 1/2" plus another 14 1/2" is 29".  A width of fabric is 40" to 42" normally.  Depending on manufacturer.  40" minus 29" leaves you with 11".  Just how is one to cut yet another 14 1/2" piece in order to get the three sub cuts from each 40" strip required for the pattern?

No one can blame the quilt shop.  They included the fabric requirements listed in the pattern.  Naturally I didn't start making this kit when the quilt shop might have had more of the fabric.  My solution?

These strips were to be used as sashing to join and go around four 14 1/2" squares.  I used the 2" strips to join the four squares.  Then four more strips for the top and bottom.  On the sides there are 1" strips.  The thinking is that the eyes go to the centre of the quilt and next to the top and bottom.  I'm hoping that the narrow strips on the sides will not stand out like a sore thumb.


After working with this designer's pattern I think one can see why I appreciate PineRose Designs.  There is never this problem with Eileens patterns!


Monday, July 10, 2017

Yet Another Quick Fall Quilt

You never know what treasures one will find when cleaning a sewing room.  All these kits just waiting to be made.

Saturday's quilt was a little one 6" x 10".  Super fast.  Or it would have been super fast if I had remembered to follow directions. 

After preparing the appliqué pieces the next steps should have been sandwiching the top, bat and bottom.  Then lay down the appliqué pieces, iron to secure them in place.  Then button hole stitch around all the pieces.  For some reason I skipped (unintentionally) the part about sandwiching the three layers. 

When did I realize I had missed a step?  As I was stitching around the very last appliqué piece.  Not a disaster, but more work.  Now I have to sandwich the three layers and then do some quilting.  Instead of using the button hole stitch for securing the appliqué and doing the quilting at one time.  Fortunately this is a very little quilt so the fix didn't take very long.  A few veins in the leaves and lines on the pumpkins and call it done.  Stupid mistakes are soooo aggravating!


I was going to start the next kit today.....How To Build A Snowman.  But not now.  Over 10,000 people have been evacuated with the BC forest fires.  Time to get back on the Bailey and get at least two quilt tops turned into finished quilts.
Add these two to the three or four I have ready for donation quilts when the call comes out.   Keeping everyone in my prayers!


Friday, July 7, 2017

Quick Fall Quilt

Today I came across a storage bin full of kits that I had totally forgotten about.  Some I had purchased from Sew Divine (my local quilt shop) and quite a few that were gifts from friends and family over the past few years.  Mostly DH and DS.

With nothing planned for the day I decided to make up the first one in the pile.
After reading the instructions (yes DS....I actually RTFM), I went to work (okay...play).   Four hours later, which included a break for lunch, here's the first kit completely finished:


Now to decide if I work on the quilt that's on my frame.  Or play with another kit.  I noticed another lovely fall hanging in that bin.....

Monday, July 3, 2017

Birthday Quilt Finished

I was asked to make a Florida quilt for a friend's husband.  The catch was the quick turn around time.  The request came last Thursday and the husband's birthday is this Wednesday.  One week to make the quilt.

A quick search turned up the centre of a quilt I got started making with left over pieces ages ago.  It was put away when a new project was started and forgotten about.  Time to get a few borders on this centre.

At least I had kept all the complimentary fabric needed in the same tote bag.  No time wasted trying to find just what was needed in my stash.  It was all there waiting.

A day or so later and the top was ready to go on the frame.  No batting.  Off to the store to pick that up.  Then, what I thought I'd use for backing just would not work.  Off to the fabric store.  Fortunately I found just the right fabric on sale.  It was the end of the bolt.  Only 5" longer than what I needed. 

Bailey felt like sewing.  Only time I had to stop was to change the bobbin.
Even the binding went on smoothly.  This is too easy.  I was right.  Way too easy.

I used a decorative stitch on the top to stitch the binding down.  It looks great on the front of the quilt.  Turn it over and it's very wavy.  I'm not pleased with that at all.  But the front looks great!  So I'm not redoing it.  I just know that it wouldn't be any better the second time around.  Hope he likes it!


Monday, June 26, 2017

Another UFO Done!

Quite a while back Sew Divine had a fun fabric line they were selling that reminded me of Florida.  Disney World to be specific.

The quilt top was quickly made.  And then forgotten about.  It was rediscovered when looking for the next top to put on the quit frame.  It's time had come.

Just before the quilting started, I happened upon a video on using the Bailey sewing machine.  I had been missing a thread guide completely.  Time to fix that.  Full of confidence I re threaded my Bailey and promptly broke a needle.  Three broken needles later and a whole lot of broken thread, both upper and bobbin, I decided the heck with this.  I went back to giving that thread guide a miss.  Within a few hours the quilt was finished.  The only stopping happened at the end of the row or when the bobbin thread ran out.  Now that's fun quilting.

So here's the Florida quilt:

The quilting is swirls, waves and water plants (more or less).  Free motion at it's most fun.

When we stay at the Disney resorts, one of the things we enjoy seeing are the turtles.  There are a few of those in this quilt:

At EPCOT we always try to make time to see the dolphins:


Animal Kingdom flamingos:


And of course, the French Fry Stealer:


DH was busy over the weekend.  He decided to pick up a wind turbine to compliment his solar panels.  It's not mounted on a tower yet.  Hopefully soon!


This will be the second wind turbine on our block.  Hopefully other neighbours will become interested.

Wednesday, June 14, 2017

Turtle Power!

Sew Divine (my local quilt shop) gets some of the nicest panels in.  Recently I found a turtle panel there.  It was purchased and stashed away for a while.

After I finished making my Florida quilt top, the fabric left over was stashed away. 

During a sewing room cleaning I re-discovered the turtle panel and wouldn't you know.  The fabric left from the Florida quilt is just right!

So here's the finished quilt.  I quilted a few turtles into the quilt so a close up of one is also shown.


Sunday, June 11, 2017

Happy 150 Canada Quilt

The Canada's 150 Birthday quilt is finished.  This quilt must have wanted to get done.  Seldom has a quilt come together at all stages so easily.  And all sides are even!


Next is cleaning the Bailey and loading the next quilt onto the frame.

Gasp....I plan on cooking today.  Pulled beef for sandwiches done in the pressure cooker.   When done in the slow cooker I'll leave it cooking all night.  It will be interesting to see how long it takes in the pressure cooker.

We had a few visitors yesterday evening.  For a while they were not getting along and a few karate kicks and punches were shared.  But they settled down for quite a long visit after a bit.

 Seven rabbits showed up.