Tuesday, September 27, 2016

A busy summer

Where did the summer go?  Fall is here and everywhere I go I smell pumpkin spice.  Not that I mind.  I love pumpkin spice anything.  We've been known to add some of the spice when brewing regular coffee.  DH isn't as keen on the taste as I am, but he does enjoy the fragrance. 

We've lost a few family members and friends over the past several months.  They are missed very much.  And will always be remembered!

On a happier note, the neighbours next door are almost finished their two and a half year renovation project.  Hopefully that will mean they can move in before Christmas.  We are certainly looking forward to watching their young family grow.

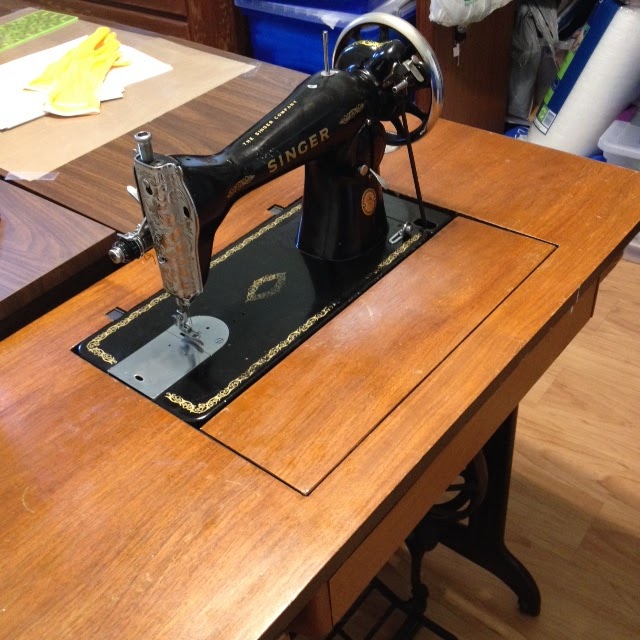
Have we slowed down on acquiring vintage sewing machines?  The answer is yes!  DH is now very interested in crystal radios.  When going through some old boxes that were stored in the garage he came across two of these little radios.  One was his as a child and the other mine.  I was so surprised that mine was still around and in working condition!  An even bigger shock was what these things are now worth!

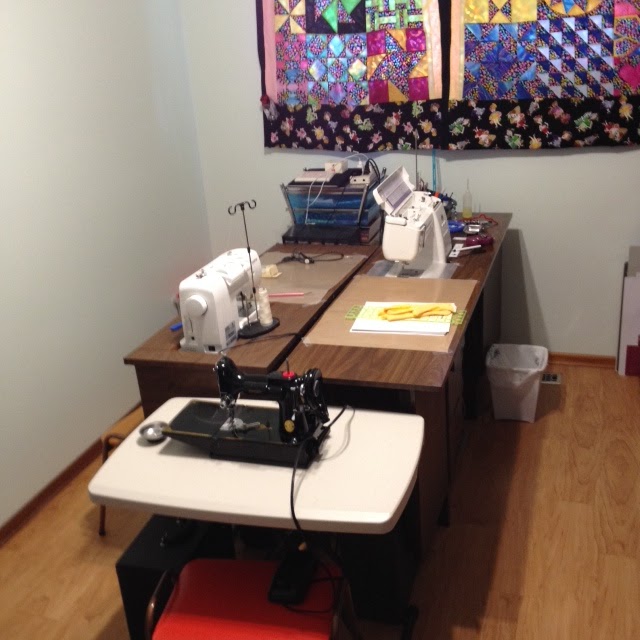
There is antenna wire strung along the ceiling in DH's office as well as in a spare bedroom to improve radio reception.  I'm sure people think we're crazy.  But it's fun!

On the quilting front I'm keeping up with the 365 Block of the Day Challenge.  There are times that I just can't be bothered with the block and will use left overs from previous blocks to make up one of my own.  I really don't think that someone looking at 365 blocks in a quilt will be able to point out one that I made up and what was "supposed" to be there.  This project is supposed to be fun.  Not a burden.

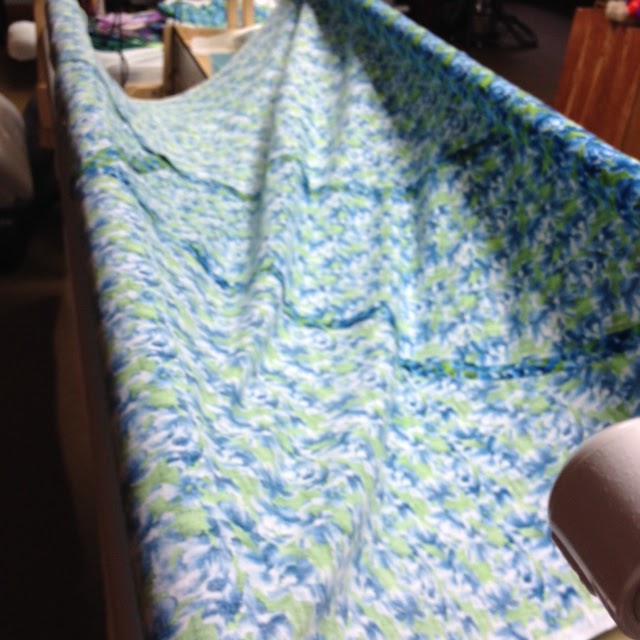
Here's one of the 365 quilts.  A dark and another light border still to be added by the end of the year.


In June the volunteer sewing group spent the day at a local residence for dementia patients.  We had a Fidget Quilt for each resident.  We did wonder how the quilts went over and if they were being used.  Two weeks before volunteer sewing started up again we found out.

The quilt shop that hosts the volunteers got a phone call requesting six more quilts.  New residents had arrived and the quilts were "needed".  So I guess the fidget quilts are a hit. 

Since the volunteer group wouldn't start up again until the end of September the owner of the shop contacted me to see if I was able to get six quilts finished ASAP.  The challenge was accepted and met:


Each quilt has a zipper, ties, pockets, different textured fabrics and buttons.  Some have metal rings.  Others fabric loops.  They were started and finished over one weekend.

Now to get back to the sewing room.  I have yet another virtual retreat to get ready for!


Tuesday, August 9, 2016

Dot to Dot quilting, Ruler Work and dollar store craft

Finally, the second L Block quilt from the hearts2hands virtual retreat has been quilted.  I attempted some Dot to Dot quilting in the smaller squares.  That was fun.  Of course I had to do it the hard way.  Because of the pattern I chose, the thread had to be secured with each square. But it's now a habit to secure the threads properly at the beginning and when ending the quilting.  And that's always a good habit to get into.

The large centre block in this quilt was my first attempt at "real" ruler work. 

Every time I tried to practice ruler work, either the thread broke, didn't make a stitch, or the foot would fall off in the middle of the seam.

 I finally watched a video for installing a ruler foot from a different company.  They add a washer between the screw that holds the foot in place and the foot.  Why not give that a try?  There are a lot of small washers left over from putting my Grace frame together (don't ask).  Well that solved the problem of the foot falling off all the time.

 Then I decided to try lowering the foot to the height of a dime instead of the recommended height.  All issues resolved!  A bit of playing around with the tension and I now have a great stitch when doing ruler work.  And ruler work is as much fun as everyone told me it was!  This photo shows the quilting a bit better:


This shows what the quilt really looks like:
The quilt is made from one piece of fabric using both the front and back of the material. 

Now for the fun find at the local dollar store:

Ever bring back brochures, resort maps post cards and the like from your vacations?  Turn them into souvenir cups.  The Dollar Tree had these plastic cups on sale for $1.25.  Remove the lids, twist to separate the two layers of plastic, remove the paper "template", fussy cut from the maps and brochures.  And this is what you get:


These two cups even show the path from the main building that we travelled to get to our rooms.

I know some who use their kids artwork in these cups.  A fun project to give the Grandparents.  Unfortunately the cups cannot go into the microwave.  That's okay.  We all need to drink more water anyway.

I almost forgot...we have an addition to our collection of sewing machines:


This is one of the few machines where DH and I do not agree on the probable date it was made.  I'm saying late 1800's.  DH says around 1910.  It makes a beautiful stitch.  Unfortunately the needles for this machine are no longer made.  So I won't be able to play with it as much as I'd like.


Sunday, July 17, 2016

Quilt Backing Talk

A few weeks ago there was a discussion on the hearts2hands group about how different quilters with mid/long arms attach their quilt backing to their frames.  There seemed to be a lot of
  • pinning one side to the leaders on the take up bar, 
  • rolling the backing onto the take up bar, 
  • pinning the opposite side to the leaders on the backing bar, 
  • rolling the backing onto the backing bar, 
  • then re-pinning the backing to the take up bar so the backing lays flat. 

I'm not that patient.  I pin one side to the take up bar leaders. Roll the backing up until the opposite end just reaches the leaders on the backing bar.  Pin that side to the leaders.  A quick look shows me if the backing is square.  If it's not, then I slide the leaders to the left or right until the backing is square.

Not square:


Squared by sliding the front leaders to the right and the back leaders to the left:

Notice the diagonal seams?  What's that all about?

If your backing is to narrow or short extra fabric naturally must be added.  But if extra fabric is added to one side then there will be bulk where the seam lays on top of itself as the quilt is rolled up on either the take up or backing bar.  Definitely a problem.

Diagonal seams do not stack.  This means no bulk throwing off the even advancement of the quilt onto the bars.

Is there any benefit to quilters who use domestic machines for quilting?  I think so.

Say you have the perfect piece of backing but it's just a bit too narrow or too short.  The problem is solved with a diagonal cut.

Here's a rectangle.  It's either too short or too narrow.


With a diagonal cut like this:


We can make it longer by sliding the two sides:


Or wider by sliding in the opposite direction:


If the backing needs to keep it's length but needs to be wider, then this just might be the answer:


By adding the rectangle between the diagonal cut the backing keeps it's length and is made wider.  If the quilter does not have the same fabric for this step, another fabric could be used.  Adding the second fabric this way does not yell "I ran out of the fabric I needed".  Which is what happens if the quilter just adds the different fabric to one side of the quilt.  Putting the fabric on a diagonal through the centre makes this a design choice.  Not an oops.


Saturday, July 9, 2016

Not another machine!

This time it's DH's fault.  Okay, maybe a little bit mine.  I spotted an older machine on kijji and made the mistake of telling DH about it.  In my defence I did tell him we shouldn't buy it.  That we have too sewing machines already.  But he felt sorry for this forgotten gem.

Made in Germany, approximately 1890, this Saxionia Fiddle Base hand crank was shipped to Poland.  The family moved to Canada and the machine was passed down from mother to daughter and then to the daughter's son.  His children and grandchildren have no interest in this piece of their history (they weren't interested in the antique dolls that belonged to their great great grandmother either).  So the sewing machine became ours for $45.

DH has spend a few hours removing the coats of oil, tar, lint, dust, pet fur, etc.  The feed dogs move, the hand crank turns, and the needle goes up and down.  There will be hours more involved in the cleaning and polishing.  But this is the first machine we've found with Mother of Pearl inlay.  And the first Fiddle Base machine I've seen in person.


On to the quilting front:

Many moons ago the hearths2hands group had a virtual retreat.  Anna gave us instructions to make the LBlock.  I kinda got carried away.  Here's the first of many quilts made from the block.  And the practise doodling I did before quilting.  I'm happy with my first attempt at doing this style of all over quilting.  Out of my comfort zone, but fun!


Another LBlock quilt is loaded on the frame and I'll be using the same pattern for the quilting.  Hopefully the quilting will be a lot better!

Wednesday, July 6, 2016

Oops I did it again

Did I just break a copy right law?  Oh well.  I, or I should say we did it again.  DH knew I wanted a sewing table for my vintage machines.  I've been using a plastic folding table from Costcos that uses up quite a bit of room in my sewing room.  He spotted a small table with a machine on kijji and the seller was only a few blocks from home.  For $35 it was worth a trip over to see it.

The seller thought the table and machine was about 40 years old.  It was her mother's and she had no desire to keep it.  When we brought it home DH checked the serial number on the treadle machine.  It was made in Scotland in approximately 1912!

After a clean up of machine and table, and oiling of both, the machine is singing.  Beautiful stitch and reasonably quiet for a treadle.  And it fits in my sewing island!  Bonus.  When the machine is lowered my other vintage machines can be used on the table.


On the sad news front, we went to Massey Sewing to pick up a spare belt for this machine.  They are closing the shop!  Time to retire.  Very sad as the guys have years of stories and experiences.  They will be missed.

I have a new sewing challenge ahead of me.  A good friend of my DS's called today.  She recently got married.  They decided to do a "trash the wedding dress" party.  Their version was to paint the bridal party's clothes with latex paint.  The couple would love a duvet cover made from the clothing.  Any pattern, but king size please.

I should be getting the clothes next week.  I'm really happy that there is no deadline for finishing.   The bride is bringing a king size flat sheet for me to use to make it easier (and less cost).

Sunday, July 3, 2016

Catching up in the sewing room news

June must have been a busy month.  I forgot to post anything!

Sew...on the quilting front, not only am I caught up on my Add A Boarder A Month project, I've finished July's as well.  Confession time.  I was behind on this project and needed to add May and June's borders.  I figured since I had the fabric and the project out I may as well do July's as well.  So I'm good until August.  And August will be a plain border.

I'm happy with how this is turning out.  But coming up with borders that will work with the fabric I have is going to be a challenge. 

I'm keeping up with the 365 Block of the Day project.  So far. 

There are 5, 6 or 10 projects on the go (probably more) that I keep forgetting about.

I'm really liking my sewing machine island from the last re-organization of my sewing room.  Having three sewing stations in the centre of the room has been working great.  Each machine is set up for a different part of the quilting process.  Piecing, free motion, etc.

My in-laws were out garage sailing and found this beauty:

It's a "nostalgic" Singers 15 made in the 1970's (we believe).  It still has the anti-rust coating on all the parts and has never been used.  At the moment it is being used as a decoration piece.  Reviews on the machine indicate that some of these reproduction machines have issues with stitch quality and noise.  Since we have no shortage of vintage machines to play with, we'll keep this one as is for now.

Speaking of sewing machines...A dear friend of ours who is on very limited income, took her machine (Singers 132 Featherweight) to a local repair shop.  She was told that the machine could not be fixed, wasn't worth spending the money on, and that she should just leave it at the shop for them to dispose of.  Since she walks or buses everywhere she left the machine.

Fortunately a friend of hers smelled something fishy, went with our friend to the shop and demanded the return of the machine.  My husband then picked the machine up so she wouldn't have to carry it and brought it home to look at.

The first thing we found was that there was no bobbin tension.  I'm the tension person in this family (I mean sewing tension, not personal!).  I could not tighten the tension.  DH took the bobbin case apart and it was full of lint.  That fixed, he then took all covers off the machine and used an air compressor to blow it out.  The repair guys probably never even opened up the machine.  There would be no way they could have missed seeing that
A:  the machine was in need of cleaning and oiling
B:  there was nothing wrong with the gears (which they claimed was the issue)

The belt is frayed a bit.  The bobbin case rattles because of some wear.  But this machine is now ready to stitch!

Our local quilt shop (Sew Divine) is collecting quilts in for those who lost everything in the huge Fort McMurray forest fire.  So you know where my last batch of charity quilts went!  Now to get busy finishing some more.

I currently have about 15 tops to quilt.  So the quilting goals for July...try to get some tops quilted!  I'm going to try for at least an hour of quilting on my Bailey each week day.  It will be interesting to see if I can discipline myself to do it.

I have some obstacles to overcome.  My colour vision, in fact my vision period, has suffered from all the laser procedures and eye injections I've had over the past few months.  So using blending thread is a no go.  I just cant see where I'm quilting.  Even with the magnifying glass I've attached to the Bailey.  So any error in the quilting is going to stick out like a sore thumb.  I'll have to make sure the quilt recipients have poor vision as well.  Then it will be all good.

And finally....Anna wrote an article about me in the July issue of The Quilt Pattern Magazine!  Sorry folks.  If you want to know what she says you'll have to subscribe!  (Or come over for a cup of coffee and a quilting session and I'll let you read my copy.)


Monday, May 30, 2016

The Sewing Room Re-Design

Stay away from Kijji.  Never look up sewing machines for sale.  Too late for this warning to do any good for me!  Last week I ended up purchasing an Elna Grasshopper.  But I'm really happy with it.  It is such a sweet machine!

The Elna Grasshopper's case turns into the table that the machine fits into.  Threading is so easy.  Drop in bobbin.  No need to loosen the flywheel when winding a bobbin.  Pop the bobbin on the bobbin winder and the flywheel disengages automatically.  The stitch is perfect!  Other than a good clean and oiling, all that needed to be done to the machine, was to change the protective pads at the bottom of both the carrying case and the machine.  Time had damaged the original rubber feet.

My friend Joan picked Mom up and the two of them came over to play with the Grasshopper.   It got rave reviews from both.  I had to watch carefully to make sure the machine didn't leave with them!

But Mom did mention that it would be a good idea if I could figure out a way to have more of my machines set up in my sewing room.  Now that's a great challenge for a rainy day.  And today it's raining.

First I had to put the sewing room contents  temporarily into the living room.  That "temporary" word always worries DH as he knows it can quickly become a permanent resident.  And I had what to move:


Back in the sewing room, no matter what I did with the sewing tables I ran out of walls to put them against.  So my solution was to move the sewing tables into the middle of the room.  Time will tell how well this will work out.  Most likely everything will be pushed against walls again the first time I stub my toe on a furniture leg.  Here's my "sewing island". 


The ironing/cutting table stayed where it was (I did move it to clear out all the threads, bits of fabric and pins that had fallen.  The book shelf that supports the thread/ruler stand stayed in place as well.


The living room is now back together, ready for company.  All the boxes and bins of quilting supplies are stashed under the sewing tables and in the closet.

And I have over 10,000 steps on my FitBit just by walking from one room to another all day.  Think this would be considered exercise by anyone else?


Wednesday, May 18, 2016

Gadgets and the "Sewing Buggy"

You never know when you will have that "I didn't know that" moment.  It's like making a wonderful discovery, but then you feel silly that you didn't know about it before.

I was watching a free Craftsy video the other day with my friend Joan.  We both had that moment.  The instructor was using a machine needle thread-er to remove the sewing machine needle.  We did a double take!  Why didn't we notice the little hole in the handle. There is always the worry that the needle may fall into the sewing machine when loosening the needle bar screw. 

Then we were totally blown away when we watched the instructor use that same needle threader to insert a new needle and hold it in place while tightening the needle bar screw.

Note the small hole at the end of the needle threader.  Pause the video, check the tool boxes for each of my machines.  And sure enough.  There is the hole for inserting the needle.  On one of my threaders there is a flat side so you can control the direction of the needle so it goes in correctly.  Beats using your fingers to hold it in place.

When checking my threaders for hand sewing needles we found that this little gadget has another use.  In the handle is a thread cutter.  I've had these threaders for years and never noticed.

The moral of this story is....check your gadgets.  You never know what else they can be used for.

Now on to the Sewing Buggy.  A while back my DH purchased a Feather Weight sewing machine for me.  It's small and light for taking to volunteer sewing.  But it's still too heavy to carry all that way.  Being the intelligent man he is, DH purchased a used jogging stroller for my new to me machine.

Well I'm not one to just walk the 18 blocks to my local quilt shop pushing a plain stroller.  Not when I can have some fun.  There was weeks where I could have worked on the cover.  But naturally I waited until the day before I was going to use the "Sewing Buggy"  But even with the time crunch I think it turned out quite well.  And it's so easy to go up and down curbs.  The timing won't be out on the machine because of a rough ride!


Off to check some more gadgets to see what else they can be used for!

Saturday, May 14, 2016

I got to test another pattern!

Eileen Hoheisel, Pine Rose Designs (Quilter In The Pines) asked for volunteers to test one of her new patterns.  Since I really enjoy Eileen's designs and instructions I was one of the first to raise a virtual hand.

As expected the only problem with this quilt top was sewer's error.  I put an entire block in going the wrong direction.  Eileen caught the error and let me know where I went wrong.  And the result is here:


I have yet to quilt this top.  I may just add a few more borders to increase the size.  We are needing quilts to go out to Fort McMurray and I think this quilt will be heading there once residents are allowed back home.

Speaking of Fort McMurray....Sew Divine (my favourite LQS) is collecting quilts to be sent to the evacuee centres.  I have a few friends that pop over to play with fabric  Between us we had 3 quilts to drop off at Sew Divine.  These quilts were utility quilts, made for rough use and to be passed on for the dog's bed. 

We're now working on quilts to welcome residents back home (like the one above).  Our way of giving hugs.  And a reminder that they are in our thoughts.


Thursday, May 5, 2016

The fun and the not so much fun

First the not fun.  The fire in Fort McMurray.  Praying for everyone's safety.  And praise for how well this emergency is being handled.  From first responders to those who are helping in so many ways.  People at their best!

On the quilt front:  I have received so many e-mails and phone calls from quilters across North America wanting to know where they can send quilts.  Especially for the kids.   I know a number of the local quilt shops will be collecting the quilts.  But not yet.  Those that are in the business of helping others will let us know when.

That said, quilts do not get made in a day. (Sorry Eleanor, I had to do it).  So a lot of us are getting started.  I'll be making pocket quilts.  Little ones who lost their favourite dolls and bears will appreciate being able to stick their soft toys in the pockets each night to keep them close.  Of course there will be a few that will decide to stick Lego and toy cars into the pockets.  Rolling over on those items in the middle of the night will be a (excuse me) wake up.

Now for the fun part.  A while back DH bought a used jogging stroller to carry my Featherweight to volunteer sewing.  If I'm going to be the "crazy little old lady" that's pushing a sewing machine in a stroller, I'm going to have fun with it.  Time to turn that stroller into a sewing machine buggy.  Lots of work still to be done.  But the head lights have been found.

It's a fan that fold up into the little case shown above.  I purchased three.  One to keep in my back pack and two to use on the sewing machine buggy.  It's a start.  Hopefully I'll get motivated to work on this project now that the ideas are flowing.

The weekend goal setting produced another finished quilt.  It's amazing what I find when I clean up around my quilt frame.  This is a scrappy jelly roll.  Always fun to make.  And now it's done!


Friday, April 29, 2016

Weekend Quilting Goals

Deb on hearts2hands mentioned having a four day weekend and hopes to get some quilt time in  A few of us decided to join in the fun.

We send an email with what our day's goals are.  This is to get the goals "in writing" in the hopes that we actually keep on track.

My goals today were:
 *   Practise quilting feathers with my Bailey
 *   Add the binding on a quilt found when cleaning up around my frame
*    Load a quilt onto the frame to force myself to quilt some feathers "for real"

I'm happy to say that the practising went well, the binding on the quilt and (quilt is in the wash), and a very small quilt top is loaded on the frame ready to quilt tomorrow.

Goals achieved for the day!

Wednesday, April 27, 2016

365 Block of the Day Challenge - The Centre

We got the email!  The one where we are told to put the borders on the centre medallion!  Finally!

After a celebration call to Joan who is working on the BOD project along with me, I ran to the sewing room.  With great anticipation hundreds of little blocks are sewn together and then added to the centre of the quilts.  And naturally things don't go as well as expected.

The blocks are all sized correctly.  Seams meet with little to no issue.  Before I know it I am proudly looking at the first quilt centre complete with borders.  Bring out the wine to celebrate!  Oh, wait.  Something looks funky. 

I decide to bring in the experts.  My DS as well as Joan.  Yep, it's funky.  There are too many lights in one corner and none in the other three.  We need some balance here people!

Mom laughs as she asks if I'm crying.  In junior high school I would cry every time I had to rip out a seam.  With a one or two years (okay - over 20) of quilting under my seam ripper, I've stopped crying.  Practise makes perfect and I'm a master frog stitcher now.

With time and patience along with some Disney podcasts, the seams are ripped, blocks turned, and the two centres are done:


I wonder when we get to add the next 100 or so blocks.....

Thursday, April 21, 2016

Photo tutorial of making the Turnstile block

The April 21 bock for the 365 Block of the Day Challenge was the Turnstile block.  As always, the instructions were there for making this block.  And as what almost always happens, the fabric I decide to use for this 3 1/2" square is not the right size.  So I improvise.

Several friends asked for some photos to explain how I made this block.  Here it is.

First 8 HSTs (half square triangles) are made.  Mine were approximately 3 1/2" square.  Don't worry if they are not perfect.  They are going to be cut down:


Cut the HSTs on the diagonal:

Make sure the lines on the ruler are on the seam.  If the HST is larger than you need, you have no need to worry about cutting exactly through the corners.  You will be fixing that when you square up the 2" blocks soon.

Next sew to a strip of fabric.  No waste as you can sew these triangles on both sides of the strip.  The photo shows the sewing on one side only, but you can see the large green space where a triangle could be sewn on the opposite side (which I did):


After cutting to separate the blocks, press open.  Then trim to 2" square.  Diagonal mark on the ruler is at the 1" mark on the seam - clear as mud?  Sorry, forgot to take a photo of the ruler on top of the block.  But you can see the seam where the two purples meet the green.  Lay the diagonal line of your ruler along that seam, with the 1" mark where the purples meet each other. 

Before trimming:

 After trimming there is one inch of purple on each side - darn 1 it would have been so much easier to just show a photo instead of explaining:

Paying close attention to the layout you will be sure to get at least one of these blocks.


And if there was no "oops" when squaring up to 2" squares, you will have four finished 3 1/2" blocks like these:


I've been asked why make four blocks.  Well I am making two quilts and there are a few of the Blocks of the day I do not like.  So when I find a block I like I make extra to take the place of the ones that will be set aside for another project.