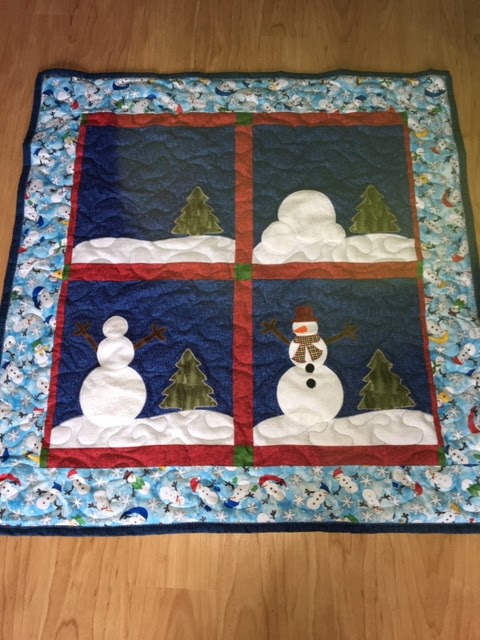
I can't even remember getting this kit. It's been "resting" with quite a few friends in a huge bin. This little wall hanging really brought home that I need way more practice with raw edge applique. Don't ask me to colour between the lines!
The quilt does hang straight and even. You wouldn't know it from the photo. Guess I need more practice taking pictures as well.
Thursday, March 14, 2019
Monday, March 11, 2019
Now on to the quilt kit challenge
All the quilt tops are now finished! What next? Quilt kits! Over the years I've acquired a number of quilt kits. Some simple, some not. This past weekend I broke out one and got it done.
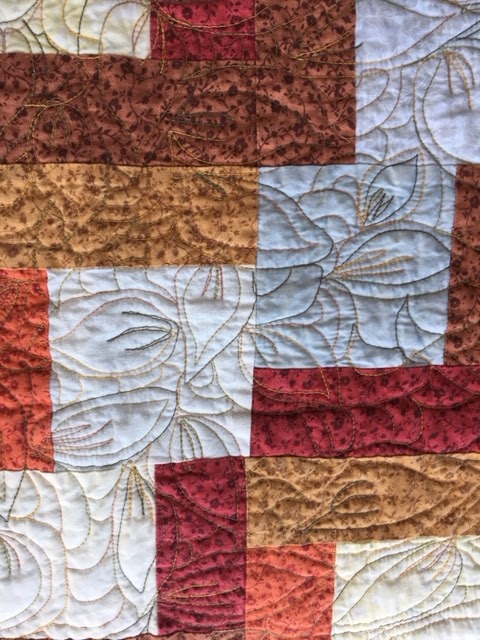
This is a raw edge applique quilt. Because of my vision issues, I had difficulty stitching down the edges of all these little pieces. I just could not see the edge and would totally miss stitching down most of the points. Out came the Crayola Washable Markers. I traced the edges that needed to be stitched down. After the quilting and binding was finished, with fingers crossed, the quilt was tossed into the washer and dryer. Would the dark blue markers wash out? Yes!
A few points were still missed, but feathers and leaves do not lay flat, so that just adds to the quilt....right?
Now to decide which kit is opened next. A cat quilt perhaps?
This is a raw edge applique quilt. Because of my vision issues, I had difficulty stitching down the edges of all these little pieces. I just could not see the edge and would totally miss stitching down most of the points. Out came the Crayola Washable Markers. I traced the edges that needed to be stitched down. After the quilting and binding was finished, with fingers crossed, the quilt was tossed into the washer and dryer. Would the dark blue markers wash out? Yes!
A few points were still missed, but feathers and leaves do not lay flat, so that just adds to the quilt....right?
Now to decide which kit is opened next. A cat quilt perhaps?
Tuesday, March 5, 2019
Quilt tops are now quilts
During a clean up of my sewing room, I came across a number of quilt tops in need of time on the quilting frame. Some of these were quite well aged.
Last year I finally quilted the roman tile bed quilt. That was years in the making. I got carried away making the blocks and the top would have covered a king size bed with a twin bed beside it. I removed a number of rows, quilted the queen sized quilt and it's on the bed. But what to do with the left over blocks?
Here's the queen size:
And here's what I made with the left over blocks:
The quilt was finished several weeks ago. Now for the rest of the "found" tops.
A little four patch to practice quilting:
There were a lot of HST's left over, so they were cut down to the same size and this baby quilt is the result:
Wish I could remember where the pattern is for this one. I'd like to make another:
I posted photos of my stash and asked the hearts2hands to pick the fabric and the border to put around the centre of this quilt. There is a border a month. This was back in 2016 if I remember correctly. It's finally finished!
A close up of the quilting for this one. So mindless and fun! I had a big stupid grin on my face the whole time I was quilting it!
Another quilt from left over blocks (orphan blocks).
This is a very scrappy quilt. When I ran out of white on white, I cut up an old bed sheet my Mom had given me. It works and there's fabric out of my stash.
A simple 9 patch for quilting practice. A good baby quilt size.
Last year I finally quilted the roman tile bed quilt. That was years in the making. I got carried away making the blocks and the top would have covered a king size bed with a twin bed beside it. I removed a number of rows, quilted the queen sized quilt and it's on the bed. But what to do with the left over blocks?
Here's the queen size:
And here's what I made with the left over blocks:
The quilt was finished several weeks ago. Now for the rest of the "found" tops.
A little four patch to practice quilting:
There were a lot of HST's left over, so they were cut down to the same size and this baby quilt is the result:
Wish I could remember where the pattern is for this one. I'd like to make another:
I posted photos of my stash and asked the hearts2hands to pick the fabric and the border to put around the centre of this quilt. There is a border a month. This was back in 2016 if I remember correctly. It's finally finished!
A close up of the quilting for this one. So mindless and fun! I had a big stupid grin on my face the whole time I was quilting it!
Another quilt from left over blocks (orphan blocks).
This is a very scrappy quilt. When I ran out of white on white, I cut up an old bed sheet my Mom had given me. It works and there's fabric out of my stash.
A simple 9 patch for quilting practice. A good baby quilt size.
Sunday, March 3, 2019
All Caught Up
There has been a lot of quilting/sewing happening. Here's a few photos and descriptions.
We've all seen the bowl cozies - soup bowl size. These are serving bowl size. So much easier to pass around hot food without worrying about passing around the pot holder as well.
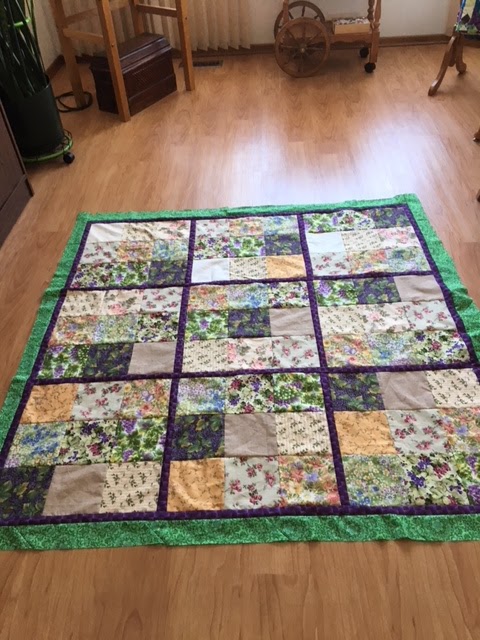
I found this little wall hanging top at the bottom of pile of fabric. Time to get it quilted and on the wall for Christmas.
This panel was given to me and I had no idea what to do with it. So there it sat for a long time. It's been quilted and gifted. Done!
I think DS was teasing when he said he wanted a Disney Christmas quilt. But I took the challenge. No Fab Five character prints at the fabric store. So I pulled out the embroidery machine and did a whole lot of embroidery. It was ready before December!
Next post will be of all the quilt tops forgotten about and recently re-discovered.
They are all finished!
We've all seen the bowl cozies - soup bowl size. These are serving bowl size. So much easier to pass around hot food without worrying about passing around the pot holder as well.
I found this little wall hanging top at the bottom of pile of fabric. Time to get it quilted and on the wall for Christmas.
This panel was given to me and I had no idea what to do with it. So there it sat for a long time. It's been quilted and gifted. Done!
I think DS was teasing when he said he wanted a Disney Christmas quilt. But I took the challenge. No Fab Five character prints at the fabric store. So I pulled out the embroidery machine and did a whole lot of embroidery. It was ready before December!
Next post will be of all the quilt tops forgotten about and recently re-discovered.
They are all finished!
Thursday, February 28, 2019
Tote for Sew Handy Machine and using a garmet rack when sewing
A while back I posted a photo of my little Sew Handy (made in 1955). The original box is in terrible condition so she has a new tote bag for storage.
There are dividers to keep the clamp from scratching the machine as well as another divider to keep the manuals secure.
On one of the quilting groups I was asked how I use garment racks to help when quilting or binding larger quilts. This system takes a huge weight off the shoulders and back. It also keeps the quilt from veering off at an angle due to the weight of the fabric.
It really does work well!
There are dividers to keep the clamp from scratching the machine as well as another divider to keep the manuals secure.
On one of the quilting groups I was asked how I use garment racks to help when quilting or binding larger quilts. This system takes a huge weight off the shoulders and back. It also keeps the quilt from veering off at an angle due to the weight of the fabric.
It really does work well!
Friday, February 22, 2019
Been a long, long time
No posts for how long? How did that happen? Life gets in the way. My main excuse has been difficulty with my vision. The eyes are co-operating better today so I'm going to post a few photos.
The first set of photos is not anything I made, but a gift I received at the volunteer sewing Christmas part. An embroidered towel that has temperature/measurement conversions as well as cooking temperatures. Thanks Jean for this towel. What a lot of work:
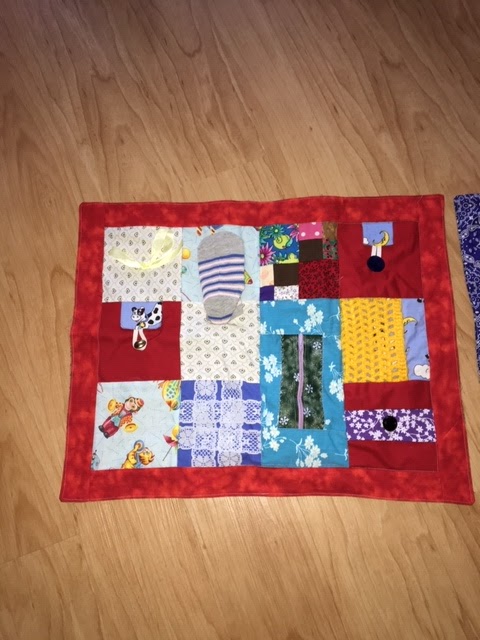
Our volunteer sewing group is still making lots of fidget quilts for dementia patients. Here's a couple of recent ones:
Hopefully I remember to post a lot more photos in the near future.
The first set of photos is not anything I made, but a gift I received at the volunteer sewing Christmas part. An embroidered towel that has temperature/measurement conversions as well as cooking temperatures. Thanks Jean for this towel. What a lot of work:
Our volunteer sewing group is still making lots of fidget quilts for dementia patients. Here's a couple of recent ones:
Hopefully I remember to post a lot more photos in the near future.
Tuesday, July 17, 2018
A "New" Sewing Machine!
Wow, it hasn't been a month since the last post. Who knows, maybe the posts will go up more frequently for the next while.
My dentist should be able to retire soon. I've had two crowns in the past month. Actually the second one is still a temporary, with the permanent one next week. Anyone wondering why I'm not buying fabric? (Besides having a huge stash already.)
Between appointments I was able to get into the sewing room a bit. Four fidget quilt tops are ready to take to volunteer sewing come September. Now I have no excuse not to get working on DS's Christmas quilt. It's on the frame, ready to be quilted. I'm just too chicken to get started! This top will not be easy to quilt.
Here are the four little fidget quilts:
Each quilt top has a block with a zipper, pockets, embroidery, either tatting or some other textured item and ribbon loops. One even has a bow and a baby sock.
DH must have got tired of my checking all the garage sales we stopped at for a toy Singer sewing machine. It's the thrill of the chase, you know. Anyway, he decided to surprise me by buying one on eBay. The 1955 Singer Sew Handy 20 arrived yesterday. She is in great condition, complete with the original manual and table clamp. A very nice stitch!
The cardboard box is in very rough shape. I know I'll get yelled at by the "experts" but I plan on doing something with the box to keep the artwork preserved. But the box will be destroyed.
I'll post a better photo once she is set up properly.
My dentist should be able to retire soon. I've had two crowns in the past month. Actually the second one is still a temporary, with the permanent one next week. Anyone wondering why I'm not buying fabric? (Besides having a huge stash already.)
Between appointments I was able to get into the sewing room a bit. Four fidget quilt tops are ready to take to volunteer sewing come September. Now I have no excuse not to get working on DS's Christmas quilt. It's on the frame, ready to be quilted. I'm just too chicken to get started! This top will not be easy to quilt.
Here are the four little fidget quilts:
Each quilt top has a block with a zipper, pockets, embroidery, either tatting or some other textured item and ribbon loops. One even has a bow and a baby sock.
DH must have got tired of my checking all the garage sales we stopped at for a toy Singer sewing machine. It's the thrill of the chase, you know. Anyway, he decided to surprise me by buying one on eBay. The 1955 Singer Sew Handy 20 arrived yesterday. She is in great condition, complete with the original manual and table clamp. A very nice stitch!
The cardboard box is in very rough shape. I know I'll get yelled at by the "experts" but I plan on doing something with the box to keep the artwork preserved. But the box will be destroyed.
I'll post a better photo once she is set up properly.
Friday, July 6, 2018
It took a while but a quilt is finished.
Back in December, 2017, Deb from hearts2hands let members know that there would be another New Years Day Mystery Quilt Event. A number of us started the new year going between our computers and sewing machines. A great way to start the year! And a quilt top finished.
Seven months later the top is still sitting on the frame. As there are a lot of tops that need to get quilted, it was time to start up the Bailey. Several hours later, the quilting was finished and the quilt off the frame. Not the quilting pattern I wanted to do. Instead a simple meander. But it's done.
The binding was finished yesterday. The quilt has been in the washer and dryer.
Today I've been piecing the backing for the next top to go on the frame. This one can't take seven months to get done. It's a Christmas present for DS. And the quilting will be very fussy. Time to get at it!
Seven months later the top is still sitting on the frame. As there are a lot of tops that need to get quilted, it was time to start up the Bailey. Several hours later, the quilting was finished and the quilt off the frame. Not the quilting pattern I wanted to do. Instead a simple meander. But it's done.
The binding was finished yesterday. The quilt has been in the washer and dryer.
Today I've been piecing the backing for the next top to go on the frame. This one can't take seven months to get done. It's a Christmas present for DS. And the quilting will be very fussy. Time to get at it!
Monday, July 2, 2018
Quilt Tops and Sewing Machines
I had promised myself that I would be better with my blog updates. Yeah, that didn't happen. It's been ages. But a lot has happened.
A molar broke, requiring multiple dentist appointments. I now have a shiny new crown (I wanted a tiara).
Volunteer sewing wrapped up for the summer with a great pot luck. I was challenged to bring vegetable noodle dish. Never one to do things the easy way (like purchase pre-made spiralized vegetables) I went all out and started by looking for a spiralizer. Fortunately I lucked out and found a $109 electric one on sale for $39. Better yet, the store was having a one day sale on the item so my final cost was just under $30. Not bad. Now to figure out how to use it. That lead to a lot of experiments. Some successful, some not. My contribution to the pot luck was reasonably received and very little came home. So I guess it was okay.
DH decided I need another sewing machine. So he picked up a Sew Handy on eBay. She should be here in a few weeks, and I can't wait! We're not sure what year she was manufactured. Once she's here, cleaned up, and researched, I'll put up a post all about this little machine.
At volunteer sewing, the gals were talking about quilted rugs made from jelly rolls (2 1/2" strips). They are lovely. A lot of fabric, batting and fusible web used to join the bat is used. All the talk about rugs made me think of toothbrush rugs.
About 30 years ago I was shown how to make these rugs. It was fun, but then other interests took over. I found the toothbrush tool (toothbrush with a hole to hang it up with, the brush part cut off and shaped to a point). But I could not remember how to make the knot used for the rug.
A quick YouTube search and I found several methods, including the one I had been shown. Naturally, I sent a link to the video to my Mom. She immediately emails me back to say she was making rugs this way back in the 1930's when she was 5 or 6 years old. These rugs were used beside the beds on winter mornings when the wood stove would have burned out and those floors were ice cold! A lot of memories were talked about! If I ever produce a rug with decent tension, I'll post a photo of it!
DH's parents love going to garage sales. MIL brought over one of her finds:
A huge pile of flannel. All in large triangle shapes. I only remembered to take a photo when the pile was 2/3" cut down into usable squares and rectangles. It took several days to get all this fabric cut down. But it will be great for the fidget quilts the volunteers make.
Susan from our MeWe group posted a photo of a quilt she's working on. As soon as she named the book I realized I have the same book. And I've never made anything from it! Off the the sewing room. Sunny Lanes from Pat Speth's "Nickle Quilts" was quickly made. This top made a small dent in my 5" scrappy squares. I might have to make a dozen more to notice any real reduction. But it's a start!
One of these days I'll get to the quilt frame, finish the quilt already on it. Then finish the 5 or 6 waiting to be quilted. Then get this one done!
A molar broke, requiring multiple dentist appointments. I now have a shiny new crown (I wanted a tiara).
Volunteer sewing wrapped up for the summer with a great pot luck. I was challenged to bring vegetable noodle dish. Never one to do things the easy way (like purchase pre-made spiralized vegetables) I went all out and started by looking for a spiralizer. Fortunately I lucked out and found a $109 electric one on sale for $39. Better yet, the store was having a one day sale on the item so my final cost was just under $30. Not bad. Now to figure out how to use it. That lead to a lot of experiments. Some successful, some not. My contribution to the pot luck was reasonably received and very little came home. So I guess it was okay.
DH decided I need another sewing machine. So he picked up a Sew Handy on eBay. She should be here in a few weeks, and I can't wait! We're not sure what year she was manufactured. Once she's here, cleaned up, and researched, I'll put up a post all about this little machine.
At volunteer sewing, the gals were talking about quilted rugs made from jelly rolls (2 1/2" strips). They are lovely. A lot of fabric, batting and fusible web used to join the bat is used. All the talk about rugs made me think of toothbrush rugs.
About 30 years ago I was shown how to make these rugs. It was fun, but then other interests took over. I found the toothbrush tool (toothbrush with a hole to hang it up with, the brush part cut off and shaped to a point). But I could not remember how to make the knot used for the rug.
A quick YouTube search and I found several methods, including the one I had been shown. Naturally, I sent a link to the video to my Mom. She immediately emails me back to say she was making rugs this way back in the 1930's when she was 5 or 6 years old. These rugs were used beside the beds on winter mornings when the wood stove would have burned out and those floors were ice cold! A lot of memories were talked about! If I ever produce a rug with decent tension, I'll post a photo of it!
DH's parents love going to garage sales. MIL brought over one of her finds:
A huge pile of flannel. All in large triangle shapes. I only remembered to take a photo when the pile was 2/3" cut down into usable squares and rectangles. It took several days to get all this fabric cut down. But it will be great for the fidget quilts the volunteers make.
Susan from our MeWe group posted a photo of a quilt she's working on. As soon as she named the book I realized I have the same book. And I've never made anything from it! Off the the sewing room. Sunny Lanes from Pat Speth's "Nickle Quilts" was quickly made. This top made a small dent in my 5" scrappy squares. I might have to make a dozen more to notice any real reduction. But it's a start!
One of these days I'll get to the quilt frame, finish the quilt already on it. Then finish the 5 or 6 waiting to be quilted. Then get this one done!
Sunday, May 27, 2018
Another Month!
I'm not doing very well in keeping this blog up to date! And there are no excuses this time. I can't even say that I've been busy quilting.
I did make a birthday present. And it was well received. I love this wallet pattern. It's very practical. And light. Of course that depends on what's in it. But at least it doesn't start out as being heavy. Some wallets (and purses) are heavy before anything is place in them. Which is why I use fabric bags, wallets and purses.
This wallet has Daisy Duck on it. My friend loves Daisy. But it's really difficult to find anything with "The Duck". Even at the Disney Parks. I'm hoping that changes in the future. But in the mean time.....here's "Her Duckness".
I did make a birthday present. And it was well received. I love this wallet pattern. It's very practical. And light. Of course that depends on what's in it. But at least it doesn't start out as being heavy. Some wallets (and purses) are heavy before anything is place in them. Which is why I use fabric bags, wallets and purses.
This wallet has Daisy Duck on it. My friend loves Daisy. But it's really difficult to find anything with "The Duck". Even at the Disney Parks. I'm hoping that changes in the future. But in the mean time.....here's "Her Duckness".
Tuesday, April 24, 2018
It's been over a month!
Where did the month of April go? Birthday's have been celebrated. Funerals attended. And dentist appointments....too many dentist appointments!
I broke another tooth. After the repair, I agreed to getting a crown for it. The dentist didn't appreciate that what I wanted was a tiara. We had words, he won.
Then the tooth broke further down. A temporary filling has been used until the gums heal enough to figure out if I'll need the crown or have the tooth pulled and an implant put in. Or some other solution. Who knows.
I had been happily quilting along with Angela Walter's free motion challenge. Then the haze on my cataract lens got so bad that I had to take a break. The lessons have been saved. The laser procedure that hopefully will fix the lens is scheduled for tomorrow. If it's successful, then it will be catch up time for the free motion challenge. I'm really looking forward to that!
I did make it to volunteer sewing last week. Bringing my trusty Featherweight machine. But my little machine would not stitch. After a half hour of frustration I moved over to the pressing and pinning station and let others do the sewing.
Turns out that when I cleaned and oiled the Featherweight, I failed to put in the bobbin casing properly. There's a little latch ((for lack of a better word) on the bobbin case that has to be secured by the needle plate. Fortunately, DH was able to figure the problem out right away.
What's happening with hearts2hands Yahoo quilting group? Looks like we may be moving over to a new platform. With the Facebook privacy issues happening, a lot of social media companies are in a panic to cover their butts. Yahoo Groups has new owners and they will be insisting that everyone agree to new privacy contracts. Which most of us are refusing to do. If we don't agree, we will be dropped from the groups.
How will we keep in touch? Over the past 10 years members of the group have become close friends. Some have met IRL. We get inspiration and support from each other. The hunt was on for a new platform for our group. And Facebook isn't where most of us were willing to go.
One member suggested MeWe. We checked it out. Watched and read reviews not only on how to use this platform, but also the privacy protections. Not bad! The group has been created under the name A Scrappy Life. Members are still not only getting used to it, but testing the privacy limits. So far, it's looking good. A bit more time consuming. And there's a learning curve. But I think we'll get used to it.
That's it for now. Off to yet another medical appointment. Hopefully I can spend time in the sewing room this evening. Even if it's just to clean machines so they are ready to hum after my laser treatment tomorrow.
Next post I hope to share my secret (from DS) project. I'm loving how it's turning out so far!!!
I broke another tooth. After the repair, I agreed to getting a crown for it. The dentist didn't appreciate that what I wanted was a tiara. We had words, he won.
Then the tooth broke further down. A temporary filling has been used until the gums heal enough to figure out if I'll need the crown or have the tooth pulled and an implant put in. Or some other solution. Who knows.
I had been happily quilting along with Angela Walter's free motion challenge. Then the haze on my cataract lens got so bad that I had to take a break. The lessons have been saved. The laser procedure that hopefully will fix the lens is scheduled for tomorrow. If it's successful, then it will be catch up time for the free motion challenge. I'm really looking forward to that!
I did make it to volunteer sewing last week. Bringing my trusty Featherweight machine. But my little machine would not stitch. After a half hour of frustration I moved over to the pressing and pinning station and let others do the sewing.
Turns out that when I cleaned and oiled the Featherweight, I failed to put in the bobbin casing properly. There's a little latch ((for lack of a better word) on the bobbin case that has to be secured by the needle plate. Fortunately, DH was able to figure the problem out right away.
What's happening with hearts2hands Yahoo quilting group? Looks like we may be moving over to a new platform. With the Facebook privacy issues happening, a lot of social media companies are in a panic to cover their butts. Yahoo Groups has new owners and they will be insisting that everyone agree to new privacy contracts. Which most of us are refusing to do. If we don't agree, we will be dropped from the groups.
How will we keep in touch? Over the past 10 years members of the group have become close friends. Some have met IRL. We get inspiration and support from each other. The hunt was on for a new platform for our group. And Facebook isn't where most of us were willing to go.
One member suggested MeWe. We checked it out. Watched and read reviews not only on how to use this platform, but also the privacy protections. Not bad! The group has been created under the name A Scrappy Life. Members are still not only getting used to it, but testing the privacy limits. So far, it's looking good. A bit more time consuming. And there's a learning curve. But I think we'll get used to it.
That's it for now. Off to yet another medical appointment. Hopefully I can spend time in the sewing room this evening. Even if it's just to clean machines so they are ready to hum after my laser treatment tomorrow.
Next post I hope to share my secret (from DS) project. I'm loving how it's turning out so far!!!
Tuesday, March 20, 2018
Free Motion Challenge - So Far
The free motion challenge has been a lot of fun. First there was meandering. I didn't think I'd enjoy meandering. Now with a bit more practice it's kinda fun.
We've done Dot to Dot quilting. I didn't do that practice, although when you see what I have done in the past, you'll know that I really need to spend more time at it!
Both of these quilts are from a hearts2hands virtual retreat where we played with the L Block and different ways to put the blocks together. On one of them I also practiced a grid pattern using ruler work.
Angela had us using an all over leaf design. You know I had fun with this. My go to is leaves. It all started out trying to quilt continuous line hearts. But the hearts never looked like hearts. So I went with leaves. No one ever expects them to look all the same. I've had hours of practice both on a DSM and on the Bailey with frame.
I still have to try out the serpentine, which is this weeks design. And get better at curves. One of these days I'll get a photo up of the practice curves. The air was blue with my first attempt. But looking back at the sample now, I think that if an entire quilt was done with these curves, it would be okay. Depending on the thread choice of course.
On a side note: I pulled out the Phoenix kit that DH gave me a few years ago. I'm very confused with the instructions. But it's not that the instructions are not really good. I'm sure they are. It's just my mind set. I'll get it figured out. What has me confused is that the pieces are to be fussy cut from one piece of fabric. But there is also some piecing before some of the cuts. Because of my blurry eye, I'm not able to concentrate for any length of time to figure out the instructions. Hopefully when my eye heals things will become "clearer" (sorry about the pun). Here's one of the fabric panels (there are four in the kit).
If I make a mistake in the cutting...there is no extra fabric. Not even on the designer's web site.
We've done Dot to Dot quilting. I didn't do that practice, although when you see what I have done in the past, you'll know that I really need to spend more time at it!
Both of these quilts are from a hearts2hands virtual retreat where we played with the L Block and different ways to put the blocks together. On one of them I also practiced a grid pattern using ruler work.
Angela had us using an all over leaf design. You know I had fun with this. My go to is leaves. It all started out trying to quilt continuous line hearts. But the hearts never looked like hearts. So I went with leaves. No one ever expects them to look all the same. I've had hours of practice both on a DSM and on the Bailey with frame.
I still have to try out the serpentine, which is this weeks design. And get better at curves. One of these days I'll get a photo up of the practice curves. The air was blue with my first attempt. But looking back at the sample now, I think that if an entire quilt was done with these curves, it would be okay. Depending on the thread choice of course.
On a side note: I pulled out the Phoenix kit that DH gave me a few years ago. I'm very confused with the instructions. But it's not that the instructions are not really good. I'm sure they are. It's just my mind set. I'll get it figured out. What has me confused is that the pieces are to be fussy cut from one piece of fabric. But there is also some piecing before some of the cuts. Because of my blurry eye, I'm not able to concentrate for any length of time to figure out the instructions. Hopefully when my eye heals things will become "clearer" (sorry about the pun). Here's one of the fabric panels (there are four in the kit).
If I make a mistake in the cutting...there is no extra fabric. Not even on the designer's web site.
Monday, March 12, 2018
The Dragon Fly Quilt Is Finished!
Finally finished the binding on the Dragon Fly wall hanging. There is still the mitered corners to stitch down. And once the decision is made on where to hang the quilt, the sleeve will have to be added. But the hard part is done. I know where the mistakes are. But hopefully one will have to get up very close to notice them!
Before I show a photo of the wall hanging, I have to mention the Virtual Retreat we had with the hearts2hands Yahoo group on Saturday. A one day event, with lots of emails back and forth. Virtual meals and desserts were enjoyed (best way to stick to a diet). Along with quilt block bingo and a mystery quilt for those who wanted to play along. A big thanks to Karen for doing this for the group!
Here's the top that I made following Karen's instructions:
A Sudoku Puzzle quilt! What a great way to use up some novelty fabric FQ's that I have. I'm thinking the next one will be a Yogi Bear quilt.
And now for the Dragon Fly Wall Hanging:
I don't think there is a right side up. So we'll check out the different ways it hang on the wall. Yes, there are a few tucks and puckers on it. But I'm still happy with the quilt.
Before I show a photo of the wall hanging, I have to mention the Virtual Retreat we had with the hearts2hands Yahoo group on Saturday. A one day event, with lots of emails back and forth. Virtual meals and desserts were enjoyed (best way to stick to a diet). Along with quilt block bingo and a mystery quilt for those who wanted to play along. A big thanks to Karen for doing this for the group!
Here's the top that I made following Karen's instructions:
A Sudoku Puzzle quilt! What a great way to use up some novelty fabric FQ's that I have. I'm thinking the next one will be a Yogi Bear quilt.
And now for the Dragon Fly Wall Hanging:
I don't think there is a right side up. So we'll check out the different ways it hang on the wall. Yes, there are a few tucks and puckers on it. But I'm still happy with the quilt.
Tuesday, February 27, 2018
Quilt Re-Made
Just finished the Star Trek quilt for DS made from salvaged fabric from the house warming gift I gave him back in May. That quilt had seams that would give way with every washing. The issue was one fabric that was fraying.
Here's hoping the new quilt stand the test of time. I used meandering for the quilting since that's what the Free Motion Challenge by Angela Walters had us practicing. The quilting went very quickly. I can see why it's a go to for a lot of quilters!
Monday, February 26, 2018
"Ruler" work on mid arm?
I'm so tempted to try ruler work using my Bailey on the quilt frame. One of these days we will get to a sewing centre so I can purchase the correct ruler foot to use for this type of quilting.
But what if I really don't like that type of quilting. It's a lot of money to spend on not only the machine foot, but also for the extra thick rulers needed and the lollipop used to support the ruler. Time to think out of the box before putting out that much cash.
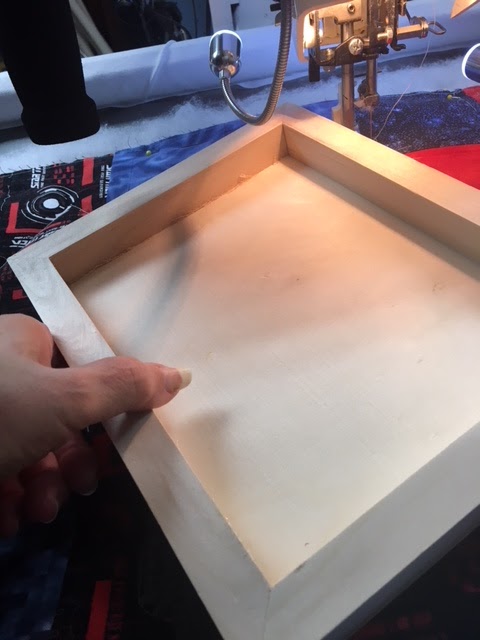
Here's what I found at the dollar store for $3:
It's a light weight "Artist Panel". Turn it upside down and you have edges that will not go under the quilting foot that is on the sewing machine.
Here's several photos of how the box fits under the machine next to the foot.
There is no way the foot will hop over this edge! So if all you want to do is put some straight edges on your quilt. Lets say for "Dot to Dot" quilting. This is a $3 way to go.
The down side is that there are no ruler markings for lining up the seams.
The upside is there is a lovely edge to hold on to for moving and placing the straight edge. Very easy to guide and keep in place! And it's so light weight that you do not need a lollipop to support the box.
A bit of fun playing with it:
There is no way I could have free handed straight lines like this. Can I do complicated designs using this box? Maybe with more patience than I have. But for some simple quilting where straight lines would be the right way to go....I'm happy with my experiment.
An update on the dragon fly quilt. I was so happy with how it was turning out using invisible thread. Then the thread started breaking, snagging, pieces getting caught up in my machine. I ended up using black thread to secure the outer edges of each wing and body.
Once that was done, it was time to secure the tiny bits of fabric that make this quilt special. Do I change the thread colour for each section? Contrary to a dear friend's opinion, I do not have that much thread! So back to the invisible thread.
After a lot of frustration, cleaning the bobbin area constantly, picking up bits and pieces of nylon thread using tweezers....I decided to follow my own advice. If something is not working...."YouTube it". Anyone who has experience with invisible thread has already guessed what I had not done. I forgot to change the upper tension on my sewing machine! After two and a half dragon flies worth of blue air, things are finally going smoothly. Hope I didn't just jinx it!
But what if I really don't like that type of quilting. It's a lot of money to spend on not only the machine foot, but also for the extra thick rulers needed and the lollipop used to support the ruler. Time to think out of the box before putting out that much cash.
Here's what I found at the dollar store for $3:
It's a light weight "Artist Panel". Turn it upside down and you have edges that will not go under the quilting foot that is on the sewing machine.
Here's several photos of how the box fits under the machine next to the foot.
There is no way the foot will hop over this edge! So if all you want to do is put some straight edges on your quilt. Lets say for "Dot to Dot" quilting. This is a $3 way to go.
The down side is that there are no ruler markings for lining up the seams.
The upside is there is a lovely edge to hold on to for moving and placing the straight edge. Very easy to guide and keep in place! And it's so light weight that you do not need a lollipop to support the box.
A bit of fun playing with it:
There is no way I could have free handed straight lines like this. Can I do complicated designs using this box? Maybe with more patience than I have. But for some simple quilting where straight lines would be the right way to go....I'm happy with my experiment.
An update on the dragon fly quilt. I was so happy with how it was turning out using invisible thread. Then the thread started breaking, snagging, pieces getting caught up in my machine. I ended up using black thread to secure the outer edges of each wing and body.
Once that was done, it was time to secure the tiny bits of fabric that make this quilt special. Do I change the thread colour for each section? Contrary to a dear friend's opinion, I do not have that much thread! So back to the invisible thread.
After a lot of frustration, cleaning the bobbin area constantly, picking up bits and pieces of nylon thread using tweezers....I decided to follow my own advice. If something is not working...."YouTube it". Anyone who has experience with invisible thread has already guessed what I had not done. I forgot to change the upper tension on my sewing machine! After two and a half dragon flies worth of blue air, things are finally going smoothly. Hope I didn't just jinx it!
Thursday, February 22, 2018
Machine Applique On The Dragon Fly Wall Hanging
Yesterday I asked the ladies at volunteer sewing how they would stitch down the little pieces of fabric on the dragon fly quilt.
Raw edge, button hole and satin stitch were the main suggestions. Being lazy, I decided on raw edge.
But this morning even that seemed daunting. Having to turn that large piece of backing under the sewing needle so often was a pain. And I'd have to do it twice, once for the coloured fabric, and once again for the black.
Sew I put a hopping foot on my machine, used the zig zag setting, kept the feed dogs up, set the machine on slow stitching so I wouldn't get ahead of myself, and stitched down part of a wing using a free motion movement.
I'm using invisible nylon thread on the top, and black in the bobbin. So far, this has worked like a dream. A close look at the stitching will show that the stitches are uneven. But you would have to make sure your glasses are on to see it. No constantly turning that huge backing under the needle. I used the zig zag setting just in case I was too slow to move the
fabric, plus the needle moving side to side means I have to move the
fabric under the needle less.
I sent the above description in an e-mail to my quilting pals on hearts2hands to see if anyone on the group has ever used this type of stitching for machine appliqué before. I'm hoping that they will get back to me before I go much further. If they have tried this and found a problem, I want to know. Ripping out tiny stitches is not my favourite pass time! Here's hoping I hear from them before I have time to get back to the sewing machine!
Wednesday, February 21, 2018
Free Motion Challenge Week 2
A few of us have joined Angela Walter's Free Motion Challenge. The first week's video was explaining the project and how to get our practice material ready.
This week we are practicing meandering. This is definitely something I have never tried. Not exactly comfortable with it. So a lot more practice is needed!
Now to practice this on the long arm!
This week we are practicing meandering. This is definitely something I have never tried. Not exactly comfortable with it. So a lot more practice is needed!
Now to practice this on the long arm!
Subscribe to:
Posts (Atom)